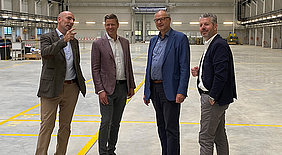
After less than a year of construction, the new assembly hall with connected logistics center on the company premises of KLINGELNBERG GmbH in Hückeswagen-Winterhagen was officially inaugurated at the end of 2022. Covering a total area of 8,000 square meters and located at the future Gustav-Adolf-Klingelnberg-Straße 1, the new facility is where Klingelnberg is now building large gear machines in particular, which are destined for use in the wind power industry, among others. New office workspaces with a dedicated canteen have also been built and will be ready for move-in by 2023 at the latest.
The challenging project set on a tight time line was completed in just ten months. The groundbreaking ceremony took place in December 2021. Two months later, the concrete columns were installed, followed by the roof trusses in April. Thanks to modern building and plant engineering practices, optimal operating conditions were created: the halls will be fully air-conditioned and equipped with two bridge cranes – one with a 25-ton working load limit and one with a 40-ton working load limit – and 10 wall-mounted traveling cranes, each with a 3.5-ton capacity. This means that even the most sensitive and heaviest machines can be assembled there.
From the planning and realization phases onward, energy efficiency and environmental protection were a key focus. The hall is built to meet the climate-efficiency requirements according to KfW 55 – a climate standard that is not particularly common for industrial buildings at present.
The machine hall officially commenced operations on 12 September 2022, with the start of assembly of the Höfler RAPID 1600 and VIPER 500 Cylindrical Gear Grinding Machines. The Höfler Cylindrical Gear Grinding Machine RAPID-series is specialized for workpieces up to 8 meters in diameter and 100 tons, while the Höfler Cylindrical Gear Grinding Machine VIPER 500 is designed for component diameters up to 500 mm and is therefore ideal for small to medium batches. With its extensive machine portfolio covering a range of requirements, Klingelnberg is able to meet the needs of just about every sector and industry.
“With a volume of EUR 20 million, this was the largest single investment we made in recent years. In this day and age, it’s not easy to complete such a complex construction project within budget and on schedule. On behalf of the management, I would like to thank all our employees who actively supported this project and ensured it was completed on time,” said Christoph Küster, Chief Financial Officer of the KLINGELNBERG Group. “The project was an important component for the future-preparedness of our location. By expanding our capacity, we created new jobs in Hückeswagen. Our company already has over 150 years of history in the Oberbergischer Kreis district, and we are thrilled to continue making history in this tradition-steeped location.”
To celebrate the inauguration of the new assembly hall, Klingelnberg’s Management Board invited all employees at the Hückeswagen location to partake of a light meal on site. Dietmar Persian, mayor of the town of Hückeswagen, also visited Klingelnberg in the afternoon.

